Smart Methods for Turning Artwork into Embroidery Patterns
Turning artwork into embroidery is not as simple as copying an image. Embroidery machines do not read normal pictures. They need a special stitch plan that tells them how to sew every line, shape, and color. This is why smart planning is very important in embroidery work.
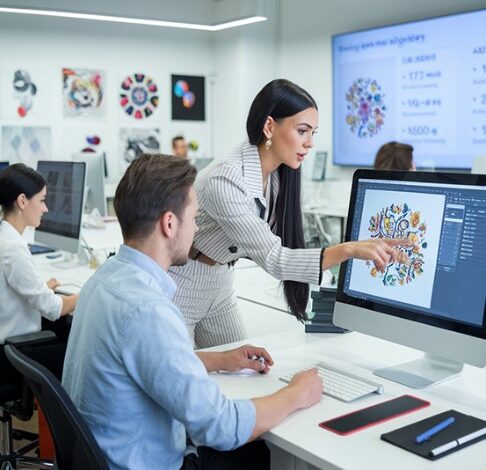
Many designers use professional help like Digitize Logo for Embroidery to convert artwork into clean and machine-ready stitch files. This process helps keep designs sharp, smooth, and balanced when stitched on fabric. Without proper conversion, even a nice artwork can turn into a messy embroidery result.
At Digitizing Buddy, experts carefully study artwork before turning it into embroidery patterns. This helps improve stitch flow and fabric results for every project.
What Does It Mean to Turn Artwork into Embroidery Patterns?
Artwork conversion is the process of changing a digital image into a stitch file for embroidery machines.
Why This Step Is Needed
Embroidery machines cannot understand JPG or PNG images. They need stitch instructions instead.
What the File Controls
- Stitch direction
- Stitch type
- Stitch density
- Color changes
- Stitch path
A good embroidery pattern acts like a map for the machine.
Why Smart Conversion Matters
Not all artwork is ready for embroidery.
Poor Conversion Problems
- Uneven stitching
- Broken thread
- Blurry shapes
- Fabric pulling
Smart Conversion Benefits
- Clean stitch flow
- Sharp design edges
- Smooth fabric finish
- Better durability
Smart methods help improve both look and quality.
Step 1: Start with Clean Artwork
Good embroidery starts with good artwork.
Use High-Quality Images
Clear images give better results.
Avoid Blurry Files
Low-quality images make digitizing hard.
Keep Designs Simple
Simple shapes convert better into stitches.
At Digitizing Buddy, designers often clean artwork before starting embroidery conversion.
Step 2: Remove Unnecessary Details
Not every detail works in embroidery.
Tiny Elements Cause Issues
Small lines may disappear during stitching.
Too Much Detail Overloads Design
Over-detailed art may look messy on fabric.
Smart Simplification Helps
Keep only strong and visible elements.
Simple designs stitch more cleanly.
Step 3: Choose the Right Fabric First
Fabric affects how embroidery looks.
Cotton Fabric
Easy and stable for stitching.
Stretch Fabric
Needs strong support and careful settings.
Thick Fabric
Requires balanced stitch density.
Soft Fabric
Needs gentle stitching and proper backing.
Good artwork conversion always considers fabric type.
Step 4: Convert Shapes into Stitch Paths
Stitch path is the direction stitches follow.
Why Stitch Path Matters
Bad paths create jumps and messy stitching.
Good Path Benefits
- Smooth flow
- Less thread break
- Clean finish
Planning the Path
Start from one section and move logically across the design.
Experts always plan stitch paths carefully.
Step 5: Select Proper Stitch Types
Different stitches create different effects.
Satin Stitch
Used for borders and text.
Fill Stitch
Used for large areas.
Running Stitch
Used for outlines and fine details.
Choosing the right stitch improves embroidery quality.
Step 6: Control Stitch Density
Density controls how close stitches are placed.
High Density
Can make fabric stiff.
Low Density
May leave gaps in design.
Balanced Density
Gives smooth and soft embroidery.
Proper density is key for clean results.
Step 7: Add Underlay Stitches
Underlay stitches support the design.
Why Underlay Is Important
- Stabilizes fabric
- Improves top stitches
- Prevents sinking
Common Types
Edge Run
Creates clean edges.
Zigzag Underlay
Supports satin stitches.
Fill Underlay
Supports large designs.
Good underlay improves the final embroidery look.
Step 8: Match Thread Colors Carefully
Color choice matters in embroidery.
Keep Brand Colors Accurate
Colors must match brand identity.
Limit Color Changes
Too many changes slow production.
Test Colors First
Some shades look different on fabric.
Color control improves design clarity.
At Digitizing Buddy, color matching is tested before final production.
Step 9: Simplify Gradients and Effects
Embroidery cannot handle all digital effects.
Gradients Are Difficult
They may not stitch smoothly.
Shadow Effects May Fail
Small details can get lost.
Use Solid Colors Instead
Solid shapes work best for embroidery.
This keeps designs clean and readable.
Step 10: Adjust for Stitch Direction
Stitch direction changes design appearance.
Better Fabric Control
Proper angles reduce pulling.
Improved Shine
Thread reflects light differently based on direction.
Stronger Texture
Direction adds depth to embroidery.
Experts carefully set stitch angles for better results.
Step 11: Test the Design Before Final Use
Testing is a must in embroidery.
Why Testing Helps
Even perfect-looking files can fail on fabric.
What to Check
- Stitch quality
- Fabric movement
- Thread tension
- Shape accuracy
Fix Small Issues Early
Testing helps avoid big production problems.
Step 12: Match Design Size to Fabric
Size affects embroidery quality.
Small Designs
Need simple details.
Large Designs
Need balanced density.
Medium Designs
Work well for most fabrics.
Correct sizing improves stitch clarity.
Step 13: Avoid Overcrowding the Design
Too many elements can ruin embroidery.
Keep Space Clean
Empty space helps design stand out.
Avoid Heavy Layers
Too many stitches can damage fabric.
Focus on Key Elements
Highlight important parts of the design.
Simple layouts work better in embroidery.
Step 14: Prepare Files for Machines
Embroidery machines need specific formats.
Common File Types
- DST
- PES
- EXP
- JEF
Why File Format Matters
Each machine reads files differently.
Correct formatting ensures smooth stitching.
Step 15: Keep Stitch Flow Natural
Natural flow improves embroidery results.
Avoid Sharp Jumps
Sudden changes may break thread.
Use Smooth Transitions
Flow should feel continuous.
Plan Logical Movement
Design should be stitched step by step.
Good flow improves final appearance.
Step 16: Reduce Machine Stress
Smart conversion helps machines work better.
Less Thread Breaks
Balanced files reduce tension issues.
Faster Production
Smooth designs run without stops.
Better Machine Life
Proper files reduce wear and tear.
Good digitizing protects both design and machine.
Step 17: Improve Logo Conversion Quality
Logos are common in embroidery.
Keep Shapes Simple
Clean shapes stitch better.
Maintain Brand Identity
Logo must stay recognizable.
Avoid Tiny Fonts
Small text may not appear clearly.
At Digitizing Buddy, logo conversion is carefully tested for clarity and balance.
Step 18: Use Professional Digitizing Tools
Software plays a big role in embroidery conversion.
Popular Tools
- Wilcom
- Hatch
- CorelDRAW
Why Tools Matter
They help control stitch details precisely.
Good tools improve accuracy and quality.
Step 19: Learn from Real Embroidery Samples
Experience improves skill.
Study Finished Products
Look at real stitched results.
Compare Before and After
Check artwork vs embroidery output.
Improve Settings Over Time
Adjust based on results.
This builds strong digitizing skills.
Step 20: Work with Expert Digitizers
Sometimes professional help is the best choice.
Why Experts Help
- Better stitch planning
- Cleaner results
- Faster production
Experience Matters
Skilled digitizers understand fabric behavior.
Many businesses trust Digitizing Buddy for reliable embroidery conversion services.
Benefits of Smart Artwork Conversion
Clean Stitch Quality
Designs look smooth and sharp.
Better Fabric Finish
Fabric stays flat and neat.
Strong Branding
Logos look professional and clear.
Fewer Production Errors
Smart files reduce machine problems.
Good conversion improves every part of embroidery.
Common Mistakes to Avoid
Over-Detailing Artwork
Too many details cause stitch issues.
Ignoring Fabric Type
Different fabrics need different settings.
Skipping Testing
Testing prevents major errors.
Using Wrong Stitch Types
Incorrect stitches reduce quality.
Avoiding mistakes improves final results.
Final Thoughts
Turning artwork into embroidery patterns is a careful and smart process. It is not just about copying an image. It is about planning stitch flow, choosing correct settings, and understanding fabric behavior.
With the right methods, even simple artwork can become a clean and professional embroidery design. Small adjustments in stitch type, density, and direction make a big difference in final quality.
When done correctly, embroidery looks sharp, lasts longer, and represents brands in the best way possible.